Auto Layout for Table View Cells with Dynamic Heights
October 9, 2013
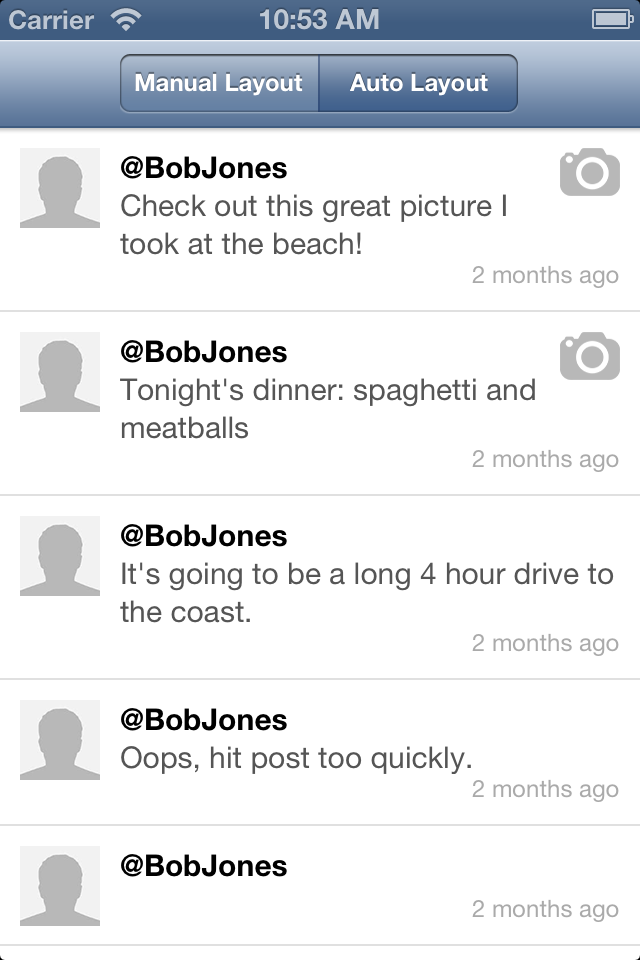
With the release of iOS 7 and my deployment target guidance that recommends support for the current and previous major iOS releases, I've started exploring the new world of Auto Layout that will soon be open to me with a deployment target of iOS 6.0. My first thought was to try to eliminate some of the pain around a large time sink: complex table cells with dynamic heights. This post will take you through my approach to manual cell layout, the many pitfalls I encountered when switching to Auto Layout cells, and a comparison of the performance of both cell layout styles. I'll be exploring these topics in the context of a fake Twitter-like messaging client that accepts user-generated content and thus must support cells of varying height. The sample project is available on GitHub.
Manual Layout
This manual layout technique has been refined over the past few years and has shipped in many apps. The basic strategy is to consolidate common layout calculations (most importantly height) into class methods of the UITableViewCell subclass. These methods can take a model object or the constituent parts of the cell UI and calculate the layout geometry without needing a specific instance of the cell to exist. This is required for UITableViewCells because a UITableView determines the table's layout and cell heights before it has even instantiated a single cell. While this enables great scrolling performance, it does make it tricky to easily support dynamic heights.
The core of the implementation is a custom method heightForObject:constrainedToWidth:, which is used to calculate the return value of tableView:heightForRowAtIndexPath:, and layoutSubviews, which positions the rendered layout. The two methods are tightly coupled because any change in the layout requires a change in the dynamic height calculation or you risk showing a cell that is too big or too small for its content. Common mistakes are to update the padding of the cell, spacing between related UI elements, or fonts without making corresponding changes in the other method. This can lead to very subtle bugs where the cell height is sporadically incorrect, for example when user-generated strings happen to render very close to the full width of a label.
Consolidating code into class methods reduces duplication of code and vastly decreases the chances you will make simple spacing or font changes in only one of the two methods. This pattern is typically concerned with the height of the layout, and thus all of the methods in the sample project are height-related:
+ (CGFloat)heightForMessage:(JSMessage*)message constrainedToWidth:(CGFloat)width+ (CGFloat)heightForUsernameFromMessage:(JSMessage*)message+ (CGFloat)heightForTextFromMessage:(JSMessage*)message constrainedToWidth:(CGFloat)width+ (CGFloat)heightForTimestampFromMessage:(JSMessage*)message
heightForMessage:constrainedToWidth:, and it uses the heightFor{element}FromMessage: methods in its implementation. The heightFor{element}FromMessage: methods are re-used in layoutSubviews when positioning each UI element. Note that heightForTextFromMessage:constrainedToWidth: contains an argument for width, which allows for the conditional display of the media icon and for multi-line display that is flexible to any interface orientation.
Calculating the individual frames of each UI element in layoutSubviews involves a fair amount of geometry and relative positioning:
	- (void)layoutSubviews {
		[super layoutSubviews];

		CGFloat iconGutterWidth = JSMessageCellPadding + self.avatarView.image.size.width + JSMessageCellPadding;
		CGFloat cellWidth = CGRectGetWidth(self.bounds);
		CGFloat labelWidth = cellWidth - iconGutterWidth - JSMessageCellPadding;

		// adjust the label width to make room for the media icon
		if (self.message.hasMedia) {
			labelWidth -= self.mediaIconView.image.size.width + JSMessageCellPadding;
		}

		self.avatarView.frame = CGRectMake(JSMessageCellPadding,
										   JSMessageCellPadding,
										   JSMessageCellAvatarWidth,
										   JSMessageCellAvatarHeight);

		self.usernameLabel.frame = CGRectMake(iconGutterWidth,
											  JSMessageCellPadding,
											  labelWidth,
											  [[self class] heightForUsernameFromMessage:self.message]);

		self.messageTextLabel.frame = CGRectMake(iconGutterWidth,
												 CGRectGetMaxY(self.usernameLabel.frame),
												 labelWidth,
												 [[self class] heightForTextFromMessage:self.message constrainedToWidth:labelWidth]);

		// case 1: an avatar + message text
		CGFloat timestampYOrigin = JSMessageCellAvatarHeight + JSMessageCellPadding - [[self class] heightForTimestampFromMessage:self.message];

		// case 2: no message text + no media icon
		timestampYOrigin = MAX(timestampYOrigin, CGRectGetMaxY(self.messageTextLabel.frame));

		// case 3: no message text + media icon, this ends up being taller than case 2
		if (self.message.hasMedia) {
			timestampYOrigin = MAX(timestampYOrigin, CGRectGetMaxY(self.mediaIconView.frame) + JSMessageCellPadding);
		}

		self.timestampLabel.frame = CGRectMake(iconGutterWidth,
											   timestampYOrigin-1,
											   cellWidth - iconGutterWidth - JSMessageCellPadding,
											   [[self class] heightForTimestampFromMessage:self.message]);

		if (self.message.hasMedia) {
			self.mediaIconView.hidden = NO;

			self.mediaIconView.frame = CGRectMake(cellWidth - self.mediaIconView.image.size.width - JSMessageCellPadding,
												  JSMessageCellPadding,
												  self.mediaIconView.image.size.width,
												  self.mediaIconView.image.size.height);

		} else {
			self.mediaIconView.hidden = YES;
		}
	}
This tedious math gives you complete control over the entire layout, but can quickly get unmanageable for very complex layouts or cells with many different variations on a base layout. Auto Layout seems to be the holy grail for solving this aspect of table cells with dynamic heights.
Auto Layout
The real magic in an Auto Layout cell is done with -[UIView systemLayoutSizeFittingSize:], which queries the layout engine for a valid layout of the view that fits as close to the given size as possible. It is used in tableView:heightForRowAtIndexPath: and given UILayoutFittingCompressedSize, which ensures the calculated size is the smallest possible that fits the contents. As mentioned previously, the table's cell instances do not exist yet, but we need an instance on which to call systemLayoutSizeFittingSize:. The recommended way to resolve this conundrum is to have an ivar or property of your custom UITableViewCell subclass (JSAutoMessageCell in the sample project) and use that solely for Auto Layout sizing. In tableView:heightForRowAtIndexPath:, simply modify the sizing cell as you would in tableView:cellForRowAtIndexPath: (cell.message = someMessage in the sample project) and then get the sizing of it. Because the sizing cell is a real, but hidden, instance of the particular cell, its layout will always match the same cell used in the table and thus will always be perfectly sized.
While re-implementing the manual cell with Auto Layout constraints, I did run across a few pain points that you should consider before making the switch.
General Frustrations
When I first started setting up constraints, I expected that setting a view's hidden property to YES would remove it from consideration by the layout engine. After some trial and error, this clearly isn't how the system behaves, but having an easy way to ignore a view during layout is a very obvious and useful feature to have. It would be great to have an attribute like NSLayoutAttributeDisplay that could be toggled by setting the constraint's constant to YES or NO. The attribute would be similar to CSS's display property just as hidden is to visibility.
Another less obvious pain point is using multi-line UILabels in a layout. I expected that if a label's text had more than one line of content at its current width, that the label's intrinsicContentSize would simply expand to a height that fits the entire text string. Assuming appropriate constraints existed to allow the label to grow to that height, it would be fully visible in the layout. Unfortunately, Auto Layout instead will only render the label with one line of text and truncate the rest. The fix is to set preferredMaxLayoutWidth to the width of your label, which allows the layout engine to correct compute the full height. Having to know the proper width ahead of time is a major restriction, and I created a UILabel subclass that keeps its preferredMaxLayoutWidth updated as its bounds change:
	- (void)layoutSubviews {
		[super layoutSubviews];

		self.preferredMaxLayoutWidth = CGRectGetWidth(self.bounds);

		[super layoutSubviews];
	}
The first call to layoutSubviews ensures that the layout is accurate before we update the preferredMaxLayoutWidth value. The second call allows the layout to update in response to the updated value.
The third pain point concerns constraint priority — it is a powerful tool to combat ambiguous layouts, but its not always clear when to adjust it. The sample cell uses it to enforce a minimum padding value below the user's avatar picture. Typically constraints for minimum or maximum values are best set to UILayoutPriorityDefaultHigh or UILayoutPriorityRequired to help the layout engine settle on an unambiguous layout. If you find yourself in a situation where you have removed autoresizing constraints and the constraints themselves seem correct but still generate an ambiguous layout, you may need to promote one to a higher priority to resolve a conflict. Setting priority is also inconvenient if you are adding constraints returned from constraintWithItem: because it doesn't have a priority argument. Instead of assigning the constraint to a local variable, use this handy class extension:
	@implementation NSLayoutConstraint (ClassMethodPriority)

	+ (id)constraintWithItem:(id)view1
				   attribute:(NSLayoutAttribute)attr1
				   relatedBy:(NSLayoutRelation)relation
					  toItem:(id)view2
				   attribute:(NSLayoutAttribute)attr2
				  multiplier:(CGFloat)multiplier
					constant:(CGFloat)c
					priority:(UILayoutPriority)priority {

		NSLayoutConstraint *constraint = [NSLayoutConstraint
			constraintWithItem:view1
					 attribute:attr1
					 relatedBy:relation
				 		toItem:view2
					 attribute:attr2
					multiplier:multiplier
					  constant:c];

		constraint.priority = priority;

		return constraint;
	}
UITableViewCell Frustrations
Using Auto Layout almost guarantees that you'll be littering your code with calls to translatesAutoresizingMaskIntoConstraints = NO on every subview. While this is annoying and inconvenient, you need to be careful to keep it as YES on the UITableViewCell itself. If set to NO, you'll encounter the following exception at runtime due to UITableView's underlying implementation:
	*** Assertion failure in -[UITableView layoutSublayersOfLayer:],
	/SourceCache/UIKit_Sim/UIKit-2891.1/UIView.m:8536

	*** Terminating app due to uncaught exception 'NSInternalInconsistencyException',
	reason: 'Auto Layout still required after executing -layoutSubviews.
	UITableView's implementation of -layoutSubviews needs to call super.'
This exception is especially frustrating because its cause is three steps removed from the code throwing it.
One convenient side effect of enabling translatesAutoresizingMaskIntoConstraints is that you can easily support landscape mode by setting the sizingCell to resize as the width of the table view changes:
	// this must be set for the cell heights to be calculated correctly in landscape
	self.sizingCell.autoresizingMask = UIViewAutoresizingFlexibleWidth;
If the cell isn't set to resize horizontally, then your landscape cells will match the height of portrait ones, but because Auto Layout is happy to use the extra width provided they will be rendered with empty space wherever your constraints give the layout engine enough flexibility.
Performance
I began this experiment with the expectation that Auto Layout would have some negative impact on performance, but hoped that it wouldn't be perceptible to the user and would be worth it in exchange for much code flexibility and clarity. I'm not convinced the code is any clearer (119 lines for manual layout cell vs. 272 lines for the Auto Layout cell), but some of the mental overhead of the constraints may be due to my lack of experience with Auto Layout and developing with that mindset. I'm going to profile four separate cases of the sample application that will build on each other, but each optimization can be turned on and off with a compile-time feature flag:
- A basic unoptimized implementation.
- #1 plus row height caching (
PERFORMANCE_ENABLE_HEIGHT_CACHE). - #2 plus a separate cell identifier for media cells (
PERFORMANCE_ENABLE_MEDIA_CELL_ID). This optimization is intended to help only the Auto Layout cells. - #3 plus iOS 7's new
tableView:estimatedHeightForRowAtIndexPath:(PERFORMANCE_ENABLE_ESTIMATED_ROW_HEIGHT).
As a baseline, I profiled the unoptimized sample application on an iPhone 4 using the Core Animation instrument to measure frame rate. The goal is to have a perfectly smooth 60 frames per second (fps) throughout the application regardless of scrolling speed. The manual layout cell averaged around 57fps during scrolling, but the Auto Layout cell fluctuated between 40 and 48fps. The next 3 sections will discuss in detail the optimizations mentioned earlier and their impact on the scrolling frame rate.
Row Height Caching
This relatively straightforward optimization spends the time to calculate a row's height only once and then caches that result in a dictionary based on a message's uniqueIdentifier. Whenever that message is scrolled into view again, tableView:heightForRowAtIndexPath: pulls the height value out of the cache instead of doing the same calculation over again:
	- (CGFloat)tableView:(UITableView *)tableView heightForRowAtIndexPath:(NSIndexPath *)indexPath {
		JSMessage *message = self.messages[indexPath.row];

		// check the cache first if enabled
		#if PERFORMANCE_ENABLE_HEIGHT_CACHE
			NSNumber *cachedHeight = self.rowHeightCache[message.uniqueIdentifier];

			if (cachedHeight != nil) {
				return [cachedHeight floatValue];
			}
		#endif


		CGFloat calculatedHeight = 0;

		// determine which dyanmic height method to use
		if (self.cellTypeSwitcher.selectedSegmentIndex == 0) {
			calculatedHeight = [JSManualMessageCell heightForMessage:message constrainedToWidth:CGRectGetWidth(tableView.bounds)];

		} else {
			self.sizingCell.message = message;

			[self.sizingCell setNeedsLayout];
			[self.sizingCell layoutIfNeeded];

			calculatedHeight = [self.sizingCell.contentView systemLayoutSizeFittingSize:UILayoutFittingCompressedSize].height;
		}

		// cache the value if enabled
		#if PERFORMANCE_ENABLE_HEIGHT_CACHE
			self.rowHeightCache[message.uniqueIdentifier] = @(calculatedHeight);
		#endif

		return calculatedHeight;
	}
On iOS 6, this effectively primes the cache as soon as the table is shown on screen because the table view queries for every row's height so it can determine the size of the scroll bar and which cells are visible initially. Optimization #4 improves this behavior when running on iOS 7. One advantage to the manual layout cell is that you can calculate all height values and prime the cache on a background thread as soon as you receive the data. This background approach won't work for the Auto Layout cell because systemLayoutSizeFittingSize: must be called from the main thread.
When profiling the updated code, the manual cell came very close to hitting the 60fps goal when pulling from the height cache. The Auto Layout cell improved to 44-50fps (a 10% increase), but the frame rate wasn't uniform across all scrolling scenarios.
Using Granular Cell Reuse Identifiers
When testing optimization #2, I wondered why the Auto Layout cell didn't match 60fps if both cells were pulling from the cache, and I also noticed a visible stutter when a cell with the media icon was scrolled into view. The Time Profiler instrument confirmed that the issue wasn't in tableView:heightForRowAtIndexPath:, instead much of the processing time was spent in -[JSAutoMessageCell updateConstraints]. From the stutter and the constraint processing time, I deduced that the layout engine was having to perform extra work when reusing a cell that had a media icon when the new message was going to remove it (and vice versa). The fix for this was pretty simple: have two separate cell identifiers for the Auto Layout cells to represent the "media" and "no media" cases. This way the layout engine won't need to update constraints to add/remove the media icon because any reused cell will already be set up appropriately.
	- (UITableViewCell *)tableView:(UITableView *)tableView cellForRowAtIndexPath:(NSIndexPath *)indexPath {
		...

		// manual layout cells
		if (self.cellTypeSwitcher.selectedSegmentIndex == 0) {
			...

		// auto layout cells
		} else {
			NSString *cellId = nil;

			// choose the appropriate cell ID
			#if PERFORMANCE_ENABLE_MEDIA_CELL_ID
				if (message.hasMedia) {
					cellId = autoCellMediaId;

				} else {
					cellId = autoCellId;
				}

			#else
				cellId = autoCellId;
			#endif


			cell = [tableView dequeueReusableCellWithIdentifier:cellId];

			if (cell == nil) {
				cell = [[JSAutoMessageCell alloc] initWithReuseIdentifier:cellId];
			}
		}

		...
	}
This optimization improved the Auto Layout cell's scrolling performance to around 50fps. On newer hardware (iPhone 5 and iPhone 5S), the performance approaches 58-60fps.
Estimated Row Heights on iOS 7
This optimization doesn't impact scrolling performance, but it does affect the way the row height cache is primed. New in iOS 7 is a UITableViewDelegate method tableView:estimatedHeightForRowAtIndexPath:, which is used by the table view to defer the calculation of row heights until just before the cell will become visible during scrolling. The estimated height value will be used to provide an approximation for the table view's scroll bars, which is then adjusted to the real value when the cell becomes visible. Small data sets won't see any noticeable improvement from implementing this method, however tables with hundreds or thousands of rows will certainly see an improvement in their initial load times.
	#if PERFORMANCE_ENABLE_ESTIMATED_ROW_HEIGHT
	- (CGFloat)tableView:(UITableView *)tableView estimatedHeightForRowAtIndexPath:(NSIndexPath *)indexPath {
		return [JSMessageCell minimumHeightShowingMediaIcon:NO];
	}
	#endif
The sample application returns the minimum possible height for the row, however your application could tweak the return value to fit the average case for your dataset. The app also has some visual defects on iOS 7 that I haven't had time to iron out, but it looks as intended on iOS 6.
Summary
It is definitely possible to use Auto Layout for table cells with dynamic heights with only a negligible performance penalty after applying some straightforward optimizations. There are some subtle issues to keep in mind setting up the constraints for a cell, but overall the process is painless once the plumbing is there and it should pay off in reduced maintenance costs (fewer bugs and quicker refactoring) as a project moves forward. Download the sample application on GitHub and get started on your own Auto Layout cells.