UIStackView on iOS 9
July 31, 2015
The Auto Layout-based UIStackView is the new standard layout class in iOS 9, and Apple recommends that developers attempt to use it first before dropping down to using NSLayoutConstraints directly, whether in code or Interface Builder. Multiple stack views can be composed to create complex layouts that wouldn't immediately be visualized as horizontal or vertical stacks of views. Many common table cell layouts like Twitter's timeline cell or Instagram's picture cell are easily implemented with a stack view or two. If you've ever used a UICollectionViewFlowLayout to arrange a small number of cells, UIStackView was made for you. It avoids the overhead of managing the layout + container combination and avoids any worries about poorly implemented cell reuse.
Getting Started
UIStackView works its layout magic on its arrangedSubviews, an array of UIViews contained in the stack. It's important to note that this is not the same as UIView's subviews array, which UIStackView has inherited as a UIView subclass. At the end of the post I'll talk about how the two arrays interact with each other and when you might want to use a subview that is not in arrangedSubviews.
Step 1: Position the Stack
The first step is to determine where the stack will be positioned within its superview. The stack itself is very flexible and will do its best to adapt its arrangedSubviews to fit the constraints you place on its position and its internal layout. If your stack must fit into a defined area (e.g., a full-size image and its caption label), you should pin all four sides to its superview and be ready for its subviews to expand or shrink as needed. If your stack should expand to fit its content (e.g., most table cells that support Dynamic Type), you should pin 3 sides to its superview and leave the edge you want to expand unconstrained. This will allow the stack to use the intrinsicContentSize of the views to determine its final size along the expansion axis. Similarly, if you only pin two edges of the stack view to establish its origin, it will use the size of the largest arranged subview perpendicular to the expansion axis and then expand along the axis as mentioned in the 3-edge case above.
Step 2: Define The Layout
As you've probably guessed, axis is the most important property on UIStackView. It determines whether the stack is positioned horizontally or vertically. How the stacked views are sized and positioned along this axis is controlled by distribution:
.Fill.FillEqually.FillProportionally.EqualSpacing.EqualCentering
UIStackViewDistribution has some fantastic visualizations to help you determine which of the 5 options will work best for your layout.
The next logical step is to determine how the views behave along the opposite axis using the alignment property:
.Fill.Leading.Top.FirstBaseline.Center.Trailing.Bottom.LastBaseline
UIStackViewAlignment options will modify a view's size (.Fill), the rest simply control how it is positioned within the stack.
The spacing property helps you to fine tune your choices for distribution and alignment. The way the value is interpreted depends on your previous choices:
Documentation:All four of these layout properties are animatable, and they give similar results to adjusting constraints and callingspacingdefines a strict spacing between arranged views for theUIStackViewDistributionFillProportionallydistributions. It represents the minimum spacing for theUIStackViewDistributionEqualSpacingandUIStackViewDistributionEqualCenteringdistributions. Use negative values to allow overlap.
view.layoutIfNeeded() when using Auto Layout directly.
arrangedSubviews vs. subviews
As a UIView, UIStackView inherits the subviews array and can be trusted to ensure consistency between it and its arrangedSubviews. If you add a view to arrangedSubviews, it will automatically be added as a subview if it wasn't already. Correspondingly, if you call removeFromSuperview on a view in the stack, it will be removed from both arrangedSubviews and subviews. The one twist is that removing a view from arrangedSubviews does not automatically remove it as a subview. This means that you can intentionally remove a view from the stack's layout but keep it visible to the user, or just add it to subviews directly. Two examples that come to mind are to get an effect similar to UITableView's sticky headers or to have a close button always visible in the top right corner of a view presented modally.
One of my favorite features of UIStackView is how easy it is to conditionally hide an arranged subview. Simply enabling the hidden property a view in the stack will remove it from the visible layout while keeping it in arrangedSubviews (it can even be animated!). There's no need to write logic to determine if a view is already visible and optionally call a hide animation, UIStackView does the heavy lifting for you. Web developers familiar with display: none will be right at home with this handy feature.
UIStackView Examples
The best way to get a sense of how UIStackView's layout properties and composition work together is to try to reimplement a non-trivial layout. Below are two popular examples from Instagram and Twitter.
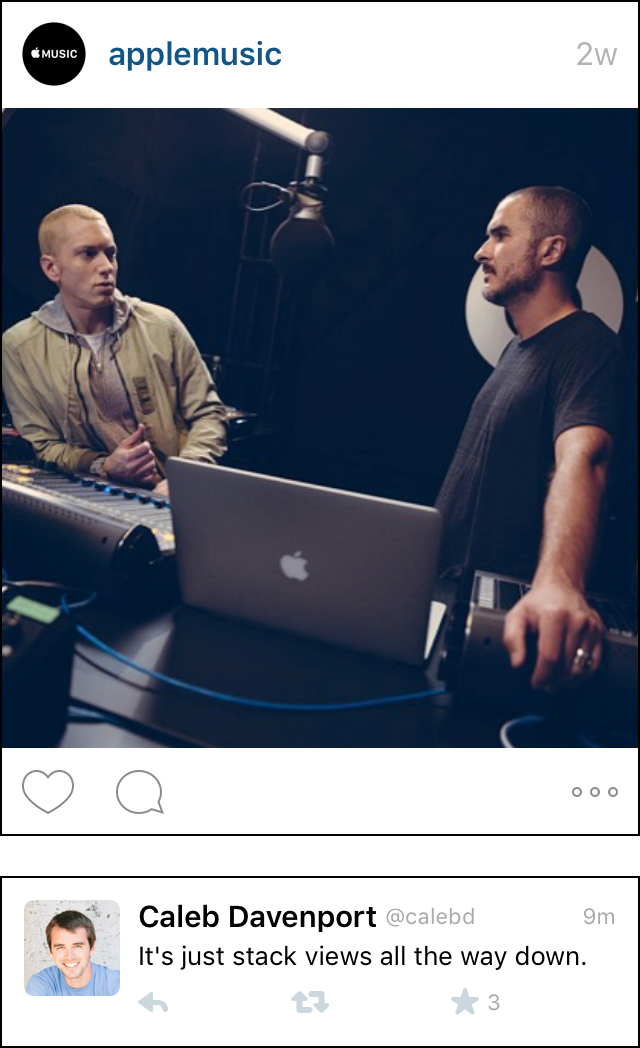
Instagram photo cell
The cell used in Instagram's main feed can be reimplemented with four stack views:
topRow: horizontally positions the profile picture, username, and timestamp labels. In addition to the out-of-the-box behavior of this stack view, two tweaks were needed to achieve the final layout:layoutMarginsare needed to add padding along the outside edge of the profile picture and the timestamp.- The
UILabelgenerated byigUsername()has itscontentHuggingPriorityset toUILayoutPriorityDefaultLowto ensure that it will be the sole view that is resized.
let topRow = UIStackView(arrangedSubviews: [igProfilePic(), igUsername(), igTimestamp()])
topRow.axis = UILayoutConstraintAxis.Horizontal
topRow.distribution = UIStackViewDistribution.Fill
topRow.alignment = UIStackViewAlignment.Center
topRow.spacing = 11
topRow.layoutMargins = UIEdgeInsets(top: 0, left: topRow.spacing, bottom: 0, right: topRow.spacing)
topRow.layoutMarginsRelativeArrangement = true
leftButtons: horizontally positions the favorite and comment buttons. This stack view is needed because the spacing between the favorite and comment buttons is not equal to the space between the comment and the more buttons.bottomRow: horizontally positions the two groups of auxiliary buttons below the photo.instagramCell: vertically positions the entire set of content. The samelayoutMarginstrick from earlier is used here to get proper padding on the very top and bottom edges.
let leftButtons = UIStackView(arrangedSubviews:[igLikeButton(), igCommentButton()])
leftButtons.axis = UILayoutConstraintAxis.Horizontal
leftButtons.distribution = UIStackViewDistribution.EqualSpacing
leftButtons.alignment = UIStackViewAlignment.Center
leftButtons.setContentHuggingPriority(UILayoutPriorityDefaultHigh, forAxis: UILayoutConstraintAxis.Horizontal)
leftButtons.spacing = 21
let bottomRow = UIStackView(arrangedSubviews: [leftButtons, igMoreButton()])
bottomRow.axis = UILayoutConstraintAxis.Horizontal
bottomRow.distribution = UIStackViewDistribution.EqualSpacing
bottomRow.alignment = UIStackViewAlignment.Center
bottomRow.layoutMargins = UIEdgeInsets(top: 0, left: 11, bottom: 0, right: 11)
bottomRow.layoutMarginsRelativeArrangement = true
let instagramCell = UIStackView(arrangedSubviews: [topRow, igPhoto(), bottomRow])
instagramCell.axis = UILayoutConstraintAxis.Vertical
instagramCell.distribution = UIStackViewDistribution.EqualSpacing
instagramCell.alignment = UIStackViewAlignment.Fill
instagramCell.spacing = 11
instagramCell.layoutMargins = UIEdgeInsets(top: instagramCell.spacing, left: 0, bottom: instagramCell.spacing, right: 0)
instagramCell.layoutMarginsRelativeArrangement = true
Twitter timeline cell
The cell in Twitter's timeline can be reimplemented with four stack views:
metadataRow: horizontally positions the top row of content.buttonRow: horizontally positions the buttons below the tweet text.contentColumn: vertically positions the three lines of content.twitterCell: horizontally positions the profile picture and content column. As the outermost stack, it requires additionallayoutMarginsto achieve padding along the outside edge.
let metadataRow = UIStackView(arrangedSubviews: [tRealName(), tUsername(), tTimestamp()])
metadataRow.axis = UILayoutConstraintAxis.Horizontal
metadataRow.distribution = UIStackViewDistribution.Fill
metadataRow.alignment = UIStackViewAlignment.Center
metadataRow.spacing = 4
let spacer = UIView()
spacer.setContentHuggingPriority(1, forAxis: UILayoutConstraintAxis.Horizontal)

let buttonRow = UIStackView(arrangedSubviews: [tReplyButton(), tRetweetButton(), tFavoriteButton(), spacer])
buttonRow.axis = UILayoutConstraintAxis.Horizontal
buttonRow.distribution = UIStackViewDistribution.EqualSpacing
buttonRow.alignment = UIStackViewAlignment.Center
buttonRow.spacing = 4
let contentColumn = UIStackView(arrangedSubviews: [metadataRow, tTweet(), buttonRow])
contentColumn.axis = UILayoutConstraintAxis.Vertical
contentColumn.distribution = UIStackViewDistribution.EqualSpacing
contentColumn.alignment = UIStackViewAlignment.Fill
contentColumn.spacing = 4
let twitterCell = UIStackView(arrangedSubviews: [tProfilePic(), contentColumn])
twitterCell.axis = UILayoutConstraintAxis.Horizontal
twitterCell.distribution = UIStackViewDistribution.Fill
twitterCell.alignment = UIStackViewAlignment.Top
twitterCell.spacing = 9
twitterCell.layoutMargins = UIEdgeInsets(top: 12, left: 12, bottom: 12, right: 12)
twitterCell.layoutMarginsRelativeArrangement = true
iOS 7 and 8 Support
Although UIStackView is only available on iOS 9+, the developer community is developing OAStackView and TZStackView, two open source reimplementations of it on iOS 7+. As of this writing neither one is quite ready for production use, however they will soon be good options for utilizing the layout magic of stack views on all iOS versions that support Auto Layout.
Source Code
The full code for the examples shown in this post are available on GitHub as a Swift playground.