User Data Isolation in iOS 6
November 5, 2012
Apple has always been cautious about exposing private information about its users to app developers or websites, however its approach prior to iOS 6 was piecemeal and incomplete. For example, location data provided by Core Location has always required user permission; but calendar access only had rudimentary protection. With the release of iOS 6, Apple has closed the privacy gap while preserving the relationship with developers and advertisers wherever possible. Developers can explain why an app needs certain privacy-related features when posting a new app version by providing a detailed description of how and why that data is used. Five different types of user data are now isolated from developers until explicit permission is granted: device location, contacts, calendars, reminders, and photos. It is especially beneficial for users to upgrade to the new OS because this protection is enabled for all apps without requiring a new version or special recompilation.
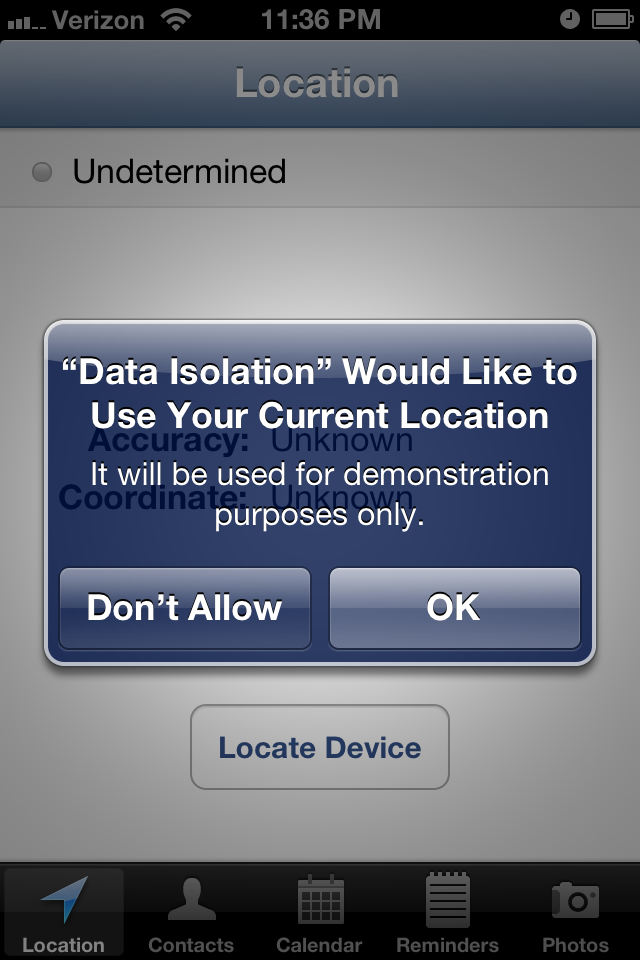
This post is accompanied by a sample application "Data Isolation" (available on GitHub) that has a different tab for each type of personal data. At the top of each is the current authorization setting for the API in use. As you toggle various privacy settings the app will update its status indicators and the data views appropriately. Note that the simulator doesn't enforce isolation for any API besides Core Location, so you should test on real hardware. During testing you can reset the authorization settings to their default values with Settings > General > Reset > Reset Location and Privacy, but keep in mind this reset applies to all apps, not just the sample one!
Authorization Status
Each separate data API has its own authorization status that lets your app know the
privileges the user has given it. The same four options apply for each, however the individual
contants are prefixed uniquely per API: kCL for Core Location, kAB
for Address Book, EK for Event Kit, and AL for Assets Library.
AuthorizationStatusNotDetermined: the user has not yet chosen how to respond to the access request.AuthorizationStatusRestricted: the request was denied and it is not possible to change it (typically due to MDM or parental controls).AuthorizationStatusDenied: the request was denied.AuthorizationStatusAuthorized: the request was allowed.
Every app is in the NotDetermined state the very first time it is launched, and
each API has one of two ways to change state. The first is on-use access requests where the
OS will automatically ask the user for access when the app first attempts to use the protected
data. The other method requires the app to specifically call an access request method which
then presents an alert to the user. For every API except Core Location, these statuses are
remembered even if an app is deleted and reinstalled, and Core Location reverts to the
AuthorizationStatusNotDetermined state when reinstalled.
Location
Core Location debuted with iOS 3.0 back in mid-2009 and has always supported rigorous privacy
controls. It is unique because it has a device On/Off setting in addition to per-app access
settings. On iOS 4.0+, you can test the global setting value using
CLLocationManager's locationServicesEnabled class method, which will
return true or false. To test your application's access, you can call another class method,
authorizationStatus, which returns one of four possibilities discussed previously.
On your first attempt to use Core Location, your app is in the
kCLAuthorizationStatusNotDetermined state and a call to
startUpdatingLocation or startUpdatingHeading will prompt the user to
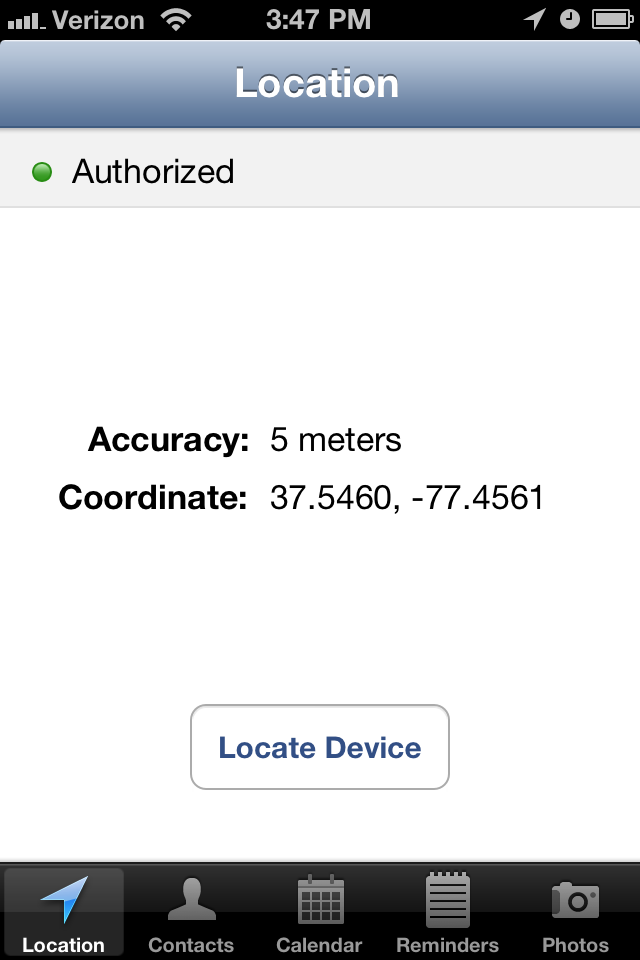
allow or deny your app access the device location. If the user accepts, the manager's delegate
will begin to receive locationManager:didUpdateLocations: or
locationManager:didUpdateHeading: messages as the data is determined. If the user
denied the request, the delegate will receive one locationManager:didFailWithError:
with an error code of kCLErrorDenied. If you ever encounter
kCLErrorDenied, you should immediately stop the manager and refrain from attempting
new requests until the authorization status changes.
If you have used Core Location in previous iOS releases, you'll want to review some new changes
to the API. The workhorse of Core Location,
locationManager:didUpdateToLocation:fromLocation:, has been deprecated in favor of
the new locationManager:didUpdateLocations:, which can process both current and
deferred location events. Deferred events are new in iOS 6 and allow an app to tell the
operating system that it isn't interested in further updates until either a certain distance
has changed or a certain amount of time has passed. If those values are permissive enough, the
device can shut down power-hungry GPS hardware when it is not needed. Note that you can't use
allowDeferredLocationUpdatesUntilTraveled:timeout: unless the location manager's
accuracy is set to kCLLocationAccuracyBestForNavigation or
kCLLocationAccuracyBest.
Contacts
A device's contacts are accessed using the C-based Address Book API. The first step is to
create an ABAddressBookRef with ABAddressBookCreateWithOptions(),
however any methods using it won't return any results until you have access to the Address Book.
The API only has per-app settings accessed through
ABAddressBookGetAuthorizationStatus() and not a global device setting. One notable
difference is that the Address Book API requires a specific access request via
ABAddressBookRequestAccessWithCompletion(AddressBookRef addressBook,
ABAddressBookRequestAccessCompletionHandler completionBlock)
instead of the automatic
prompt you get when using Core Location. The request takes the ABAddressBookRef that
you want access to and a completion handler to call once the user has responded to the alert
dialog. The completionBlock is informed of the user's boolean choice and a
CFErrorRef object if something went wrong. Typically the granted boolean is enough
to decide how the app should proceed.
	ABAddressBookRequestAccessCompletionHandler completion = ^(bool granted, CFErrorRef error) {
		if (granted) {
			[weakSelf fetchContactsAndUpdate];

		} else {
			// update the UI on the main thread
			dispatch_async(dispatch_get_main_queue(), ^{
				[contacts removeAllObjects];
				[weakSelf.tableView reloadData];
			});
		}

		[weakSelf updateStatusDisplayForStatus:ABAddressBookGetAuthorizationStatus()];
	};
Once you have access, you are free to query the ABAddressBookRef for any data
you need, which is different than the delegate-based approach used for Core Location. The sample
app's DIContactsViewController calls fetchContactsAndUpdate to fetch
all of the device's contacts once the controller is given access.
ABAddressBookCopyArrayOfAllPeople(ABAddressBookRef addressBook) is called to get
all contacts, the list is then sorted by name, and then each name is added to the
UITableView data source for display.
Notice that each access of addressBook is called on the same thread that created
it originally, a requirement of the Address Book API. In the example app it is the main thread,
however typically you shouldn't do any non-UI work on the main thread in production code.
Calendars & Reminders
Calendar events and reminders are both accessed through the Event Kit API. The code structure
is very similar to Address Book and requires an explicit authorization call. You must create
an EKEventStore and then request access to it with
requestAccessToEntityType:completion:. For calendar events the type argument is
EKEntityTypeEvent and EKEntityTypeReminder for reminders. The
completion block EKEventStoreRequestAccessCompletionHandler is exactly the same
as the Address Book handler and informs you of the user's boolean choice. At any time you can
call EKEventStore's authorizationStatusForEntityType: to query the
app-specific access setting for either calendars or reminders.
The only twist when accessing calendar or reminder data is that it requires an
NSPredicate to specify the date range and specific calendar to fetch. To search
through the calendars, calendarsForEntityType: allows you to query for event or
reminder calendars based on the same EKEntityType discussed previously. To fetch
events, you must create a predicate with EKEventStore's
predicateForEventsWithStartDate:endDate:calendars: and pass it to
eventsMatchingPredicate:. This event array can then be parsed freely by your
application; the sample app displays a reminder's start date and name, and for calendar entries
adds the end date as well.
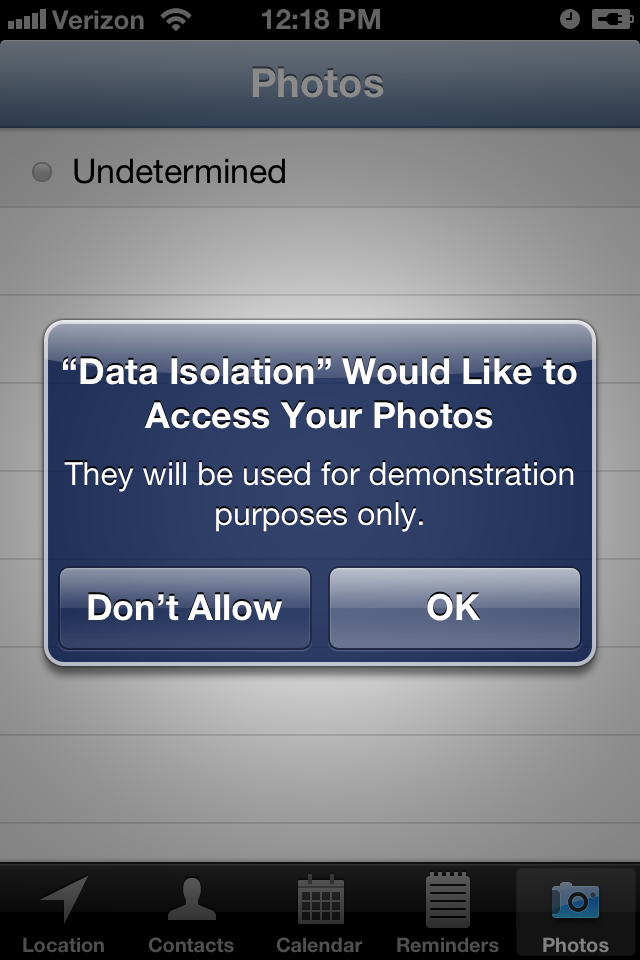
Photos and Videos
The Asset Library API is used to fetch photos from the user's photo albums and the device's
camera. You can call ALAssetsLibrary's authorizationStatus to determine
the app's specific access. It features on-demand access requests similar to Core Location, but
has the added wrinkle of a two-layer data model. Once you have authorization, you must navigate
through ALAssetGroups, which correspond to photo albums, with
enumerateGroupsWithTypes: and then through the ALAssets of the group
with enumerateAssetsUsingBlock: to get each photo or video. The sample app finds
the ALAssetsGroupSavedPhotos group, which is the special group for the camera roll,
and then lists all of its photos in a table view.

- (void)fetchPhotosAndUpdate {
	DIPhotosViewController * __weak weakSelf = self; // avoid capturing self in the block

	ALAssetsLibraryGroupsEnumerationResultsBlock groupBlock = ^(ALAssetsGroup *group, BOOL *stop) {
		// we only need to update the status UI once
		static dispatch_once_t onceToken;
		dispatch_once(&onceToken, ^{
			[weakSelf updateStatusDisplayForStatus:[ALAssetsLibrary authorizationStatus]];
		});

		NSMutableArray *photos = [NSMutableArray array];

		// only use the first group we find
		if (group != nil) {
			*stop = YES;
		}

		[group enumerateAssetsUsingBlock:^(ALAsset *result, NSUInteger index, BOOL *stop) {
			// check for more results
			if (result != nil) {
				UIImage *thumb = [UIImage imageWithCGImage:[result thumbnail]
													 scale:[UIScreen mainScreen].scale
											   orientation:UIImageOrientationUp];

				NSString *name = [[result defaultRepresentation] filename];

				[photos addObject:[NSDictionary dictionaryWithObjectsAndKeys:
									   thumb, kAssetImageKey,
									   name, kAssetNameKey,
								   nil]];

			// we're at the end, so update the UI
			} else {
				dispatch_async(dispatch_get_main_queue(), ^{
					[weakSelf setPhotos:photos];
					[weakSelf.tableView reloadData];
				});
			}
		}];
	};

	[assetLibrary enumerateGroupsWithTypes:ALAssetsGroupSavedPhotos
								usingBlock:groupBlock
							  failureBlock:failureBlock];
}
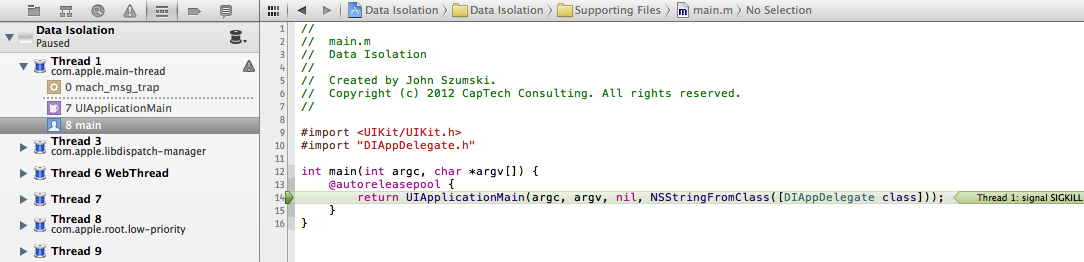
SIGKILL
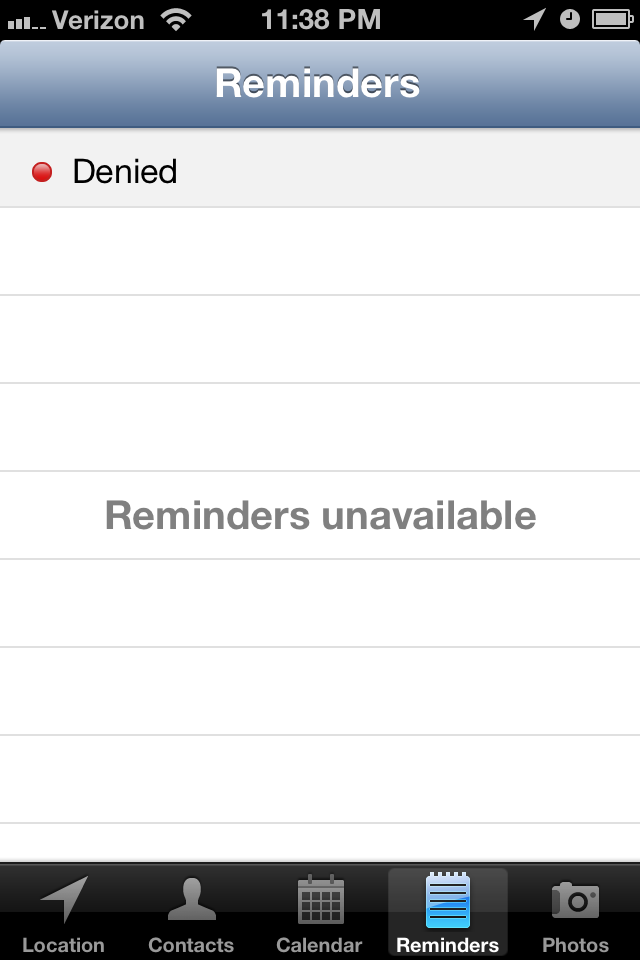
The most surprising behavior I noticed when implementing the sample app for this post is that
iOS will SIGKILL an app when its Address Book, Calendars, Reminders, or Photos access
changes. It takes this action to ensure that the app no longer has any previously authorized
data in its possession. When the user moves from the Settings app back to the third-party app,
it launches from scratch and now has the Denied authorization status. Core Location is the only
API exempt from this behavior because it is delegate-based and doesn't allow direct data
access.
It's highly recommended to implement some sort of state restoration so that when the app is
terminated and relaunched it will return the user to the view or feature that was previously
visible. In the sample app, it simply uses Key-Value Observation to track when the selected tab
changes and saves the new tab index to NSUserDefaults. When the app is relaunched,
it checks for a saved index and displays the tab at that index. If it is the first launch, it
fails to load a saved index and the integer is initialized to 0, which selects the first tab.
- (BOOL)application:(UIApplication *)application didFinishLaunchingWithOptions:(NSDictionary *)launchOptions {
	// ...

	// add KVO for state restoration
	[self.tabBarController addObserver:self forKeyPath:@"selectedViewController" options:NSKeyValueObservingOptionNew context:nil];

	return YES;
}

- (void)applicationDidBecomeActive:(UIApplication *)application {
	// restore state
	lastSelectedTab = [[NSUserDefaults standardUserDefaults] integerForKey:@"tabBarControllerSelectedTab"];
	self.tabBarController.selectedIndex = lastSelectedTab;
}

- (void)applicationWillTerminate:(UIApplication *)application {
	// clean up KVO
	[self.tabBarController removeObserver:self forKeyPath:@"selectedViewController"];
}


#pragma mark - KVO

- (void)observeValueForKeyPath:(NSString *)keyPath ofObject:(id)object change:(NSDictionary *)change context:(void *)context {
	if (object == self.tabBarController && [keyPath isEqualToString:@"selectedViewController"]) {
		// update the saved state
		[[NSUserDefaults standardUserDefaults] setInteger:self.tabBarController.selectedIndex forKey:@"tabBarControllerSelectedTab"];
		[[NSUserDefaults standardUserDefaults] synchronize];
	}
}
Purpose Strings
Purpose strings are short, developer-supplied descriptions of how and why an app is requesting
access to personal data. Examples might be "Your location will be used to find nearby
landmarks." for a directions app or "Calendar access is necessary to identify conflicting
events." for a scheduling app. These strings are stored in your application's
Info.plist file and can be specific to each type of user data. Because purpose
strings are user-facing strings, they should always be localized whenever possible. An app
can provide strings for the following keys:
NSLocationUsageDescription: displayed for any request for location data.NSPhotoLibraryUsageDescription: displayed for any request to access the photo roll or camera.NSContactsUsageDescription: displayed for any request to access contacts.NSCalendarsUsageDescription: displayed for any request to access calendars or reminders.
Note that these keys are optional, but Apple highly encourages you to provide them when appropriate. The sample application has the following keys and values:
	<key>NSCalendarsUsageDescription</key>
	<string>It will be used for demonstration purposes only.</string>
	<key>NSContactsUsageDescription</key>
	<string>They will be used for demonstration purposes only.</string>
	<key>NSLocationUsageDescription</key>
	<string>It will be used for demonstration purposes only.</string>
	<key>NSPhotoLibraryUsageDescription</key>
	<string>They will be used for demonstration purposes only.</string>
	<key>NSRemindersUsageDescription</key>
	<string>They will be used for demonstration purposes only.</string>
Best Practices
Now that you know how to access personal data with an app, it is your responsibility to use it judiciously. There are five guiding principles to proper data access:
- Ask at the time you need it. Don't request multiple types of access when your app first launches; you'll bombard the user with a flurry of alert dialogs, and he or she could easily be frustrated and delete the app immediately. If it's not clear why your app needs certain data, a user is more apt to deny the request. For example, if a news application requests Core Location access to view national headlines, it seems unnecessary and will probably be denied. However, if it waits until the user presses the "Local News" tab, it's clear why the app wants that particular access and a user will likely grant it.
- Explain your purpose. An access request is more likely to be accepted if you can clearly explain the benefits of allowing it. Also specify if and for how long that data will be stored if it must be communicated to a remote server or network. Many social networking apps request access to your contacts to automatically find friends you already know. If you can communicate that this feature saves the tediousness of finding each friend individually, a user might be more willing to grant the request.
- Handle future access changes. A user can toggle an app's specific authorization at any time through the Settings app. Don't assume that just because the user gave you access previously that you still have it. You should always check for the authorization status before enabling features or views that require personal data.
- Fail gracefully. If a user denies a request, the app shouldn't crash or become non-functional. Simply disable/hide any UI elements using the forbidden data or attempt the feature in another way. A great example of this might be searching for landmarks around the user's location. If he or she doesn't give the app Core Location access, the app should also accept a zip code or city/state name in a search field.
- Request only what you need.
If the app doesn't need access to personal data, don't request it. There are only
downsides: the user might get annoyed at the alert and delete the app; or accept it and
give you responsibility for the personal data that is now under your control.
Personal data enables fantastic features and great convenience for the user, however it requires careful thought when structuring of an app and crafting its user flow. You must consider all four authorization options and ensure that the app remains functional in each. It is also critical that you take steps to protect the highly-sensitive personal data given to you. Apple is serious about privacy, and will strictly enforce its rules in the App Store.